From the moment we walked into this house, I saw the blank wall in the dining area and envisioned a bar going there. What I didn’t envision, though, is just how easy our little DIY project would be – and how well it completes the space! If you’d like to see what the area looked like both before we moved in and after, you can visit part one of our home tour here!
how we did it.
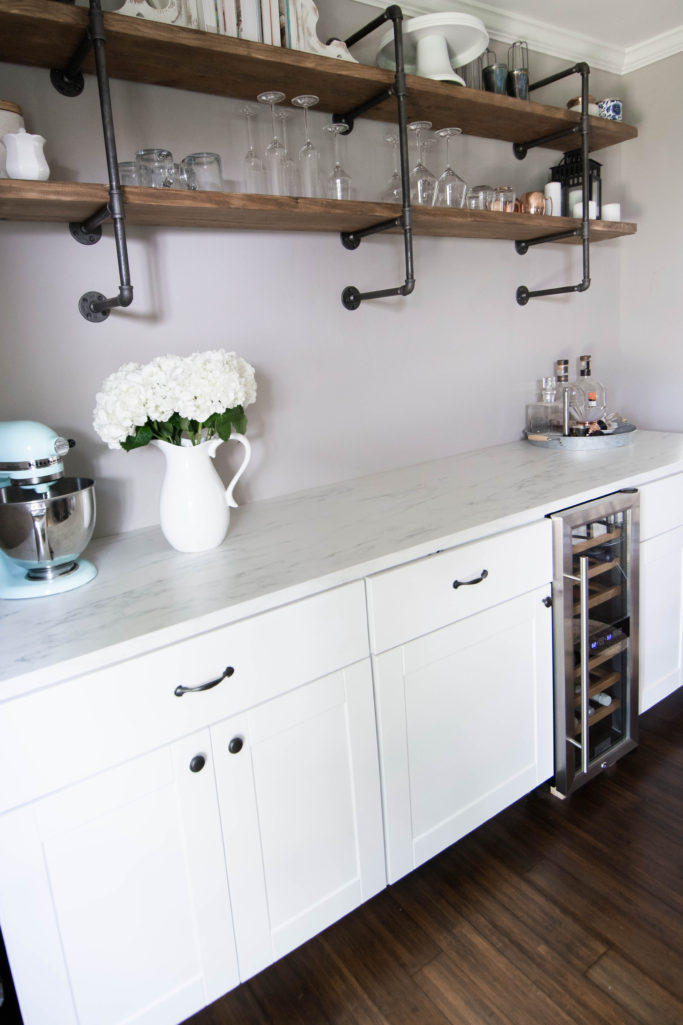
The first thing we did was decide what we wanted to use for the countertop. Since this space is very close to the kitchen and the countertop on our island, we had to decide whether we wanted to tackle finding the exact same material/pattern or see if we could find something different that wouldn’t clash. We were actually still mulling it over when we took an unrelated trip to IKEA and ended up stumbling upon this white marble effect countertop. Although it’s not actual marble, it gave me all the feels and the fact that it’s precut and ready to install was music to our ears (plus, the price was hard to say no to)! From there, everything else was pretty easy. We purchased the 98″ countertop so we knew that’s how much space we had to work with.
Another thing we knew was that we wanted to include a standing wine cooler in the new space. So we found one we liked (this one) and subtracted its width from the 98″ we had to work with.
98 – 14 = 84 inches for cabinetry
From there we took a trip to Home Depot and picked out some white shaker cabinets. We determined that we had room for two of these and one of this and brought them home! Since the wine cooler is a little bit shorter than the cabinets, we also bought these legs and simply trimmed them to the height that we needed. They replaced the legs the cooler came with that were too short.
Other than that, we chose hardware for the cabinets, purchased glue to install the countertop and footboard for the bottom of the cabinets. And that’s it! 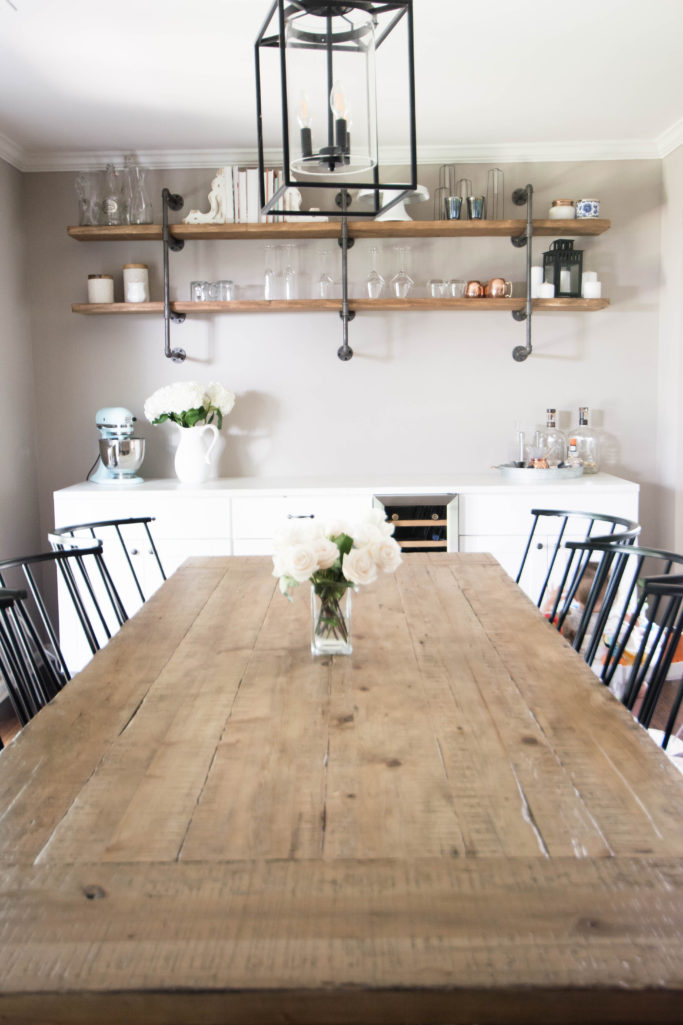
DIY steps to follow.
To recap, here are the actionable steps we took.
- Determine the length of the area you’d like to cover
- Choose countertop
- Decide on items (wine cooler) if applicable and subtract its/their width from the overall length of the countertop
- Choose cabinetry according to the leftover space (tip: we recommend leaving 1-2 inches of room for the countertop to hang over the cabinets. We didn’t do this and had a hard time lining up the cabinets perfectly so that the top covered everything)
- Place everything where you’d like it to be, including wine cooler (installed new legs to adjust height)
- Lay countertop over cabinetry and glue it down
- Install cabinet hardware
- ENJOY!



Comments are closed.